

How to Scan Old Photos for Genealogy Research
| Tweet |
|
Once we begin to delve deeper and deeper into the research of our ancestral history, photo storing and sharing websites and services become increasingly more important in connecting our families. This is where we can potentially connect with lost family members or perhaps uncover some long lost information about our family tree.
Old photographs can be an invaluable research tool, containing hidden clues to previously unknown names of both people and places that can lead to further discoveries. By uploading, storing and collaborating with relatives, many family researchers have been very successful in gaining new insights into the stories and faces depicted inside the weather and worn images. But how do we get an old photo that was taken decades before the invention of a digital camera onto a website or a platform that helps us store old photos digitally?
We simply use a digital scanner! Even taking a photo of the original image with the camera on your smartphone is a good start. But for the most efficient method of photo scanning and storage, a digital scanner or printer/scanner is usually the best choice. Here’s a short and simple 5-step process for how to scan those old family photographs.
Step One: Setting up the Printer/Scanner
If you have purchased your computer printer within the last few years or so, chances are that it already offers a photo-scanning feature.
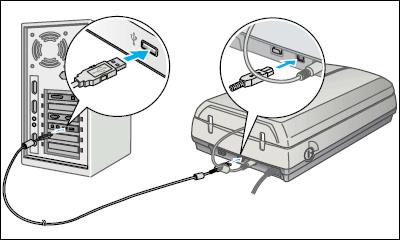
First, turn on both the computer and the printer, making sure that they are connected to one another by way of a USB cable connection. Every make and model of scanner is different, but the owner’s manual should be able to help you determine where the USB port is located.
Step Two: Loading the Image to be Scanned
In most cases, you will want to scan one photograph at a time. This makes for easier filing and storage. And the naming conventions of each picture can be easily edited in the future in cases where certain faces or locations are currently unknown in the image.
In nearly 99 percent of all printer/scanners, the photo to be scanned will be placed “face down” on the screen. There should be a designated corner of the screen, which will be used to align the photo for the best results.